
EQUIPMENT RECOMMENDATIONS
Getting into studio photography is exciting. But it can also get overwhelming fast, especially when you’re staring down a sea of gear options, price tags, and opinions online.
We sat down with Danica Lukban, the founder of Suha Studio, to talk through what equipment actually matters when you’re starting out in photography. From the lights you set up to the lens you shoot with, here’s what you need to know. She talked about it briefley in the podcast but let’s expand upon it!
LIGHTING: THE ONE THING WORTH GETTING RIGHT
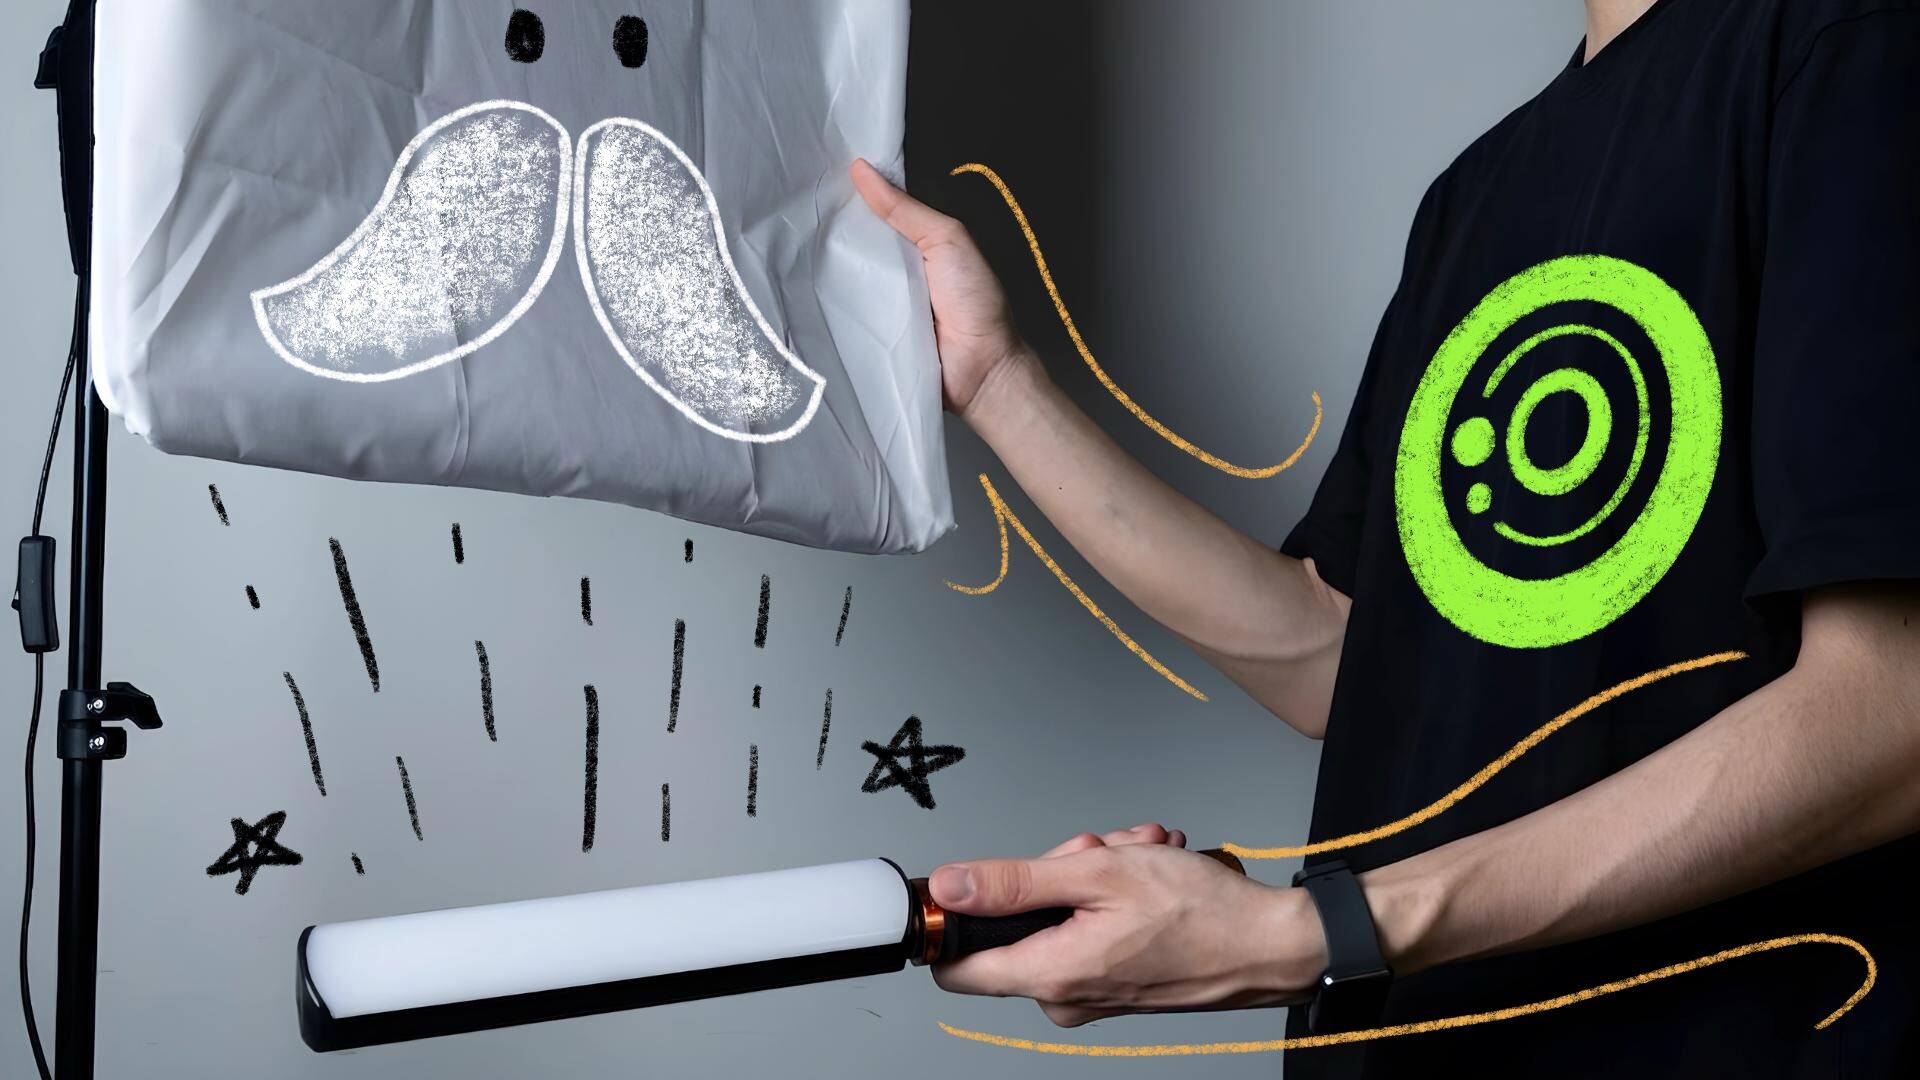
Good lighting is the foundation of any studio setup. And the good news? You do not need to spend a fortune to get started.
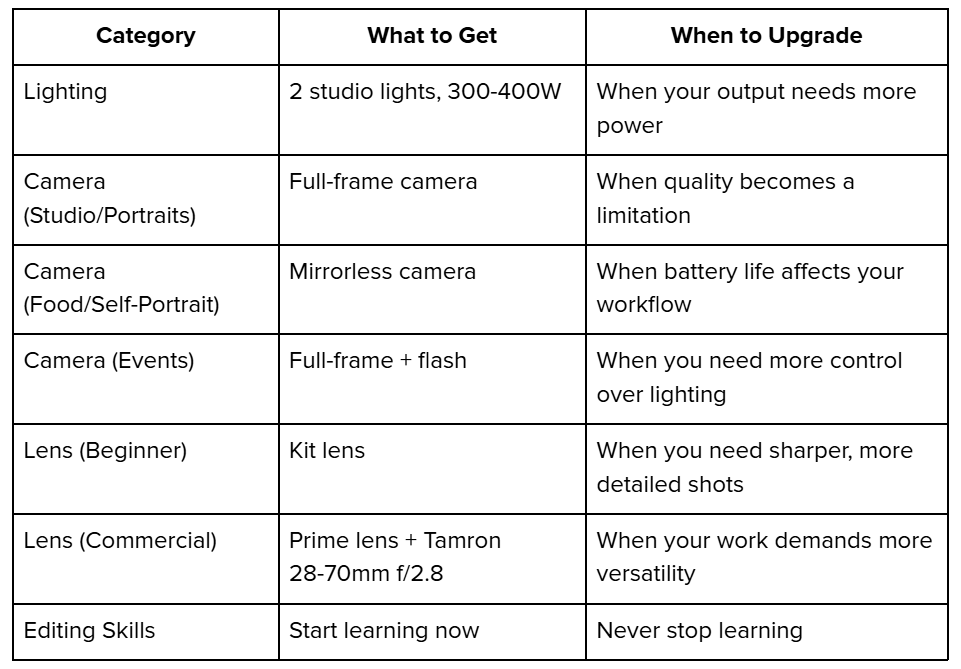
Danica recommends starting with two studio lights at 300 to 400 watts. That wattage range gives you enough power and flexibility for most studio and portrait work without going overboard.
On the brand question? She’s pretty clear: it doesn’t really matter. What matters is that the light does what you need it to do.
“It doesn’t matter what brand of lighting equipment you use, as long as it delivers the kind of lighting setup you want to achieve.”
-Danica Lukban
She mentioned using a softbox from Shopee that costs around 1,000 pesos, light stand included. And it works. So if you’re just getting started, budget lights are completely fine. Learn how to use them first, then upgrade when you actually need to.
QUICK SUMMARY
- 2 studio lights, 300 to 400 watts
- Brand doesn’t matter
- Budget options work as long as they deliver the look you’re going for
- A simple softbox with a stand is a great starting point
CAMERA BODY: FULL-FRAME AND MIRRORLESS
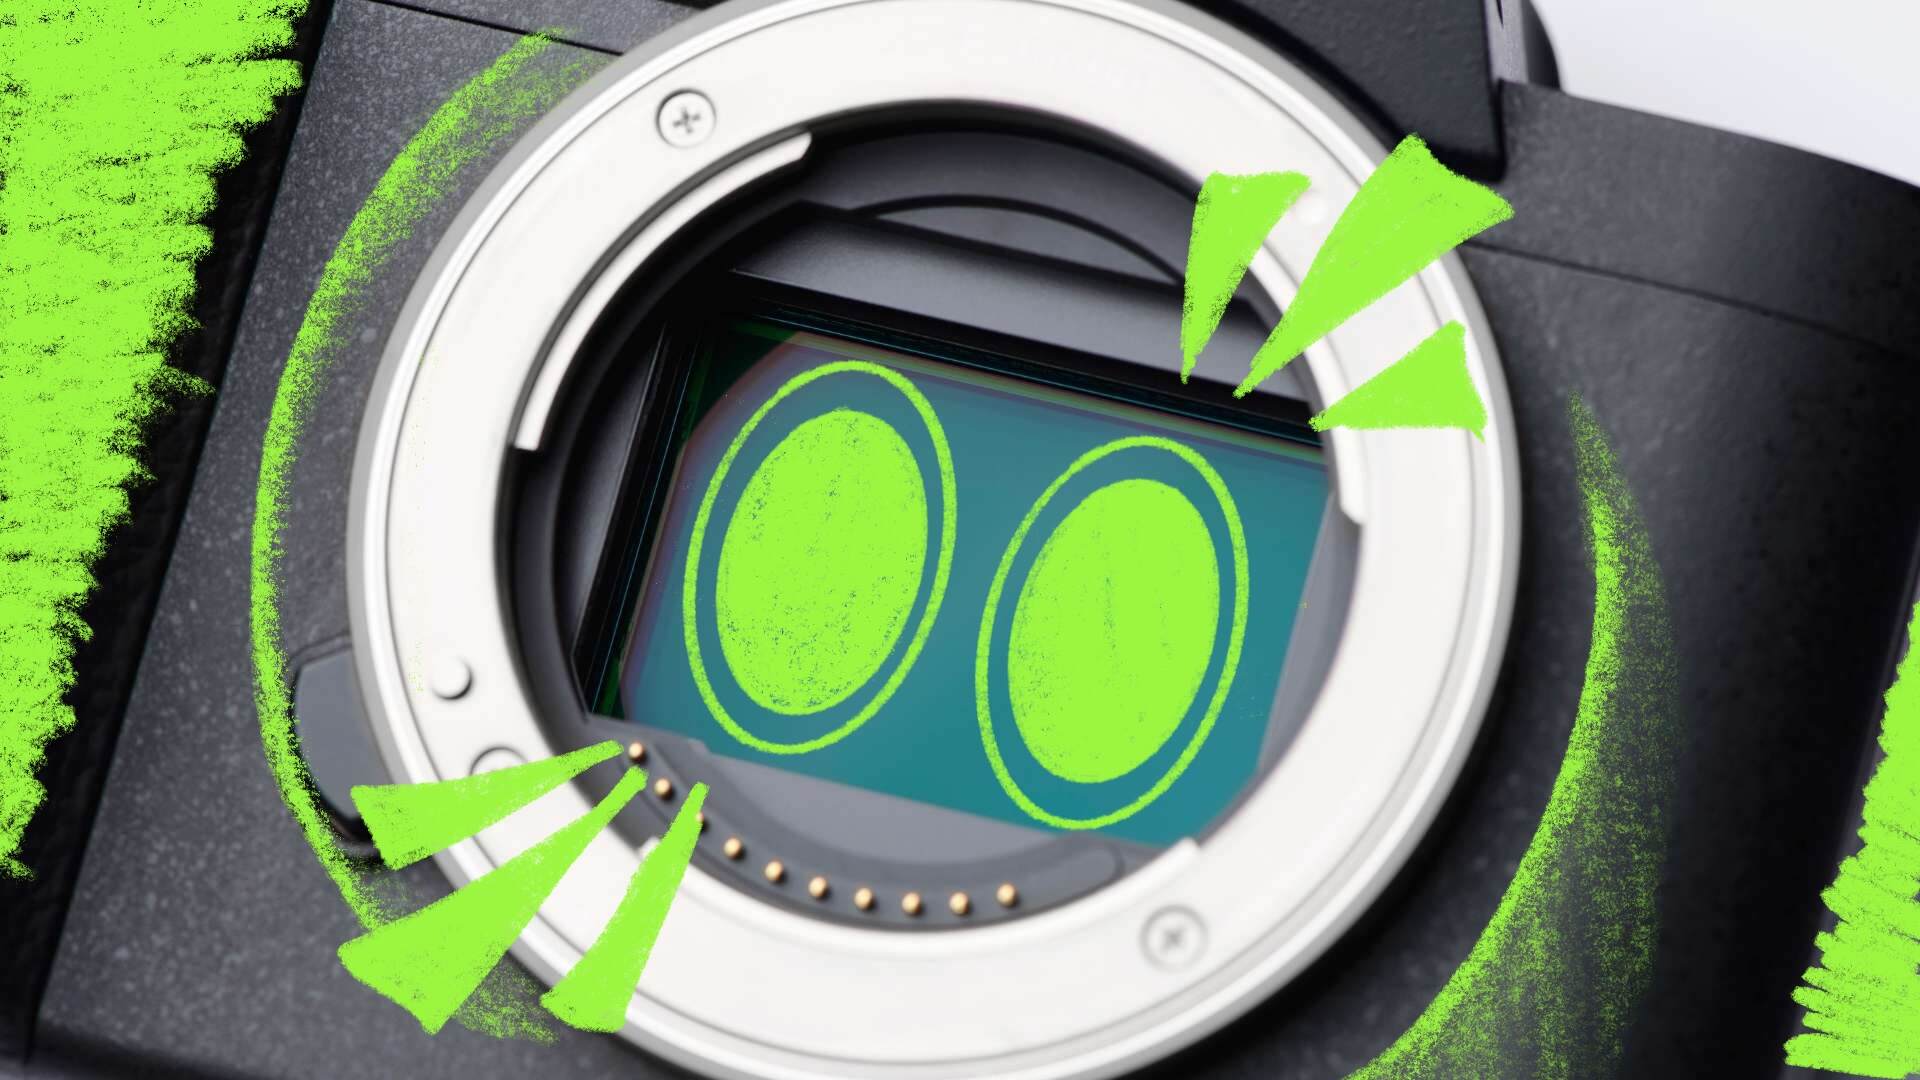
Image taken from: https://stock.adobe.com/ph/images/digital-camera-35mm-full-frame-ccd-sensor-and-lens-mount-close-up/192826602?prev_url=detail
This one comes down to what you’re shooting.
For studio and portrait photography, Danica recommends going with a full-frame camera. Simply put, it is a camera with a sensor the same size as a 35mm film frame. The image quality holds up better over time, and you won’t run into the battery issues that mirrorless cameras are known for. For portraits especially, the quality difference becomes more noticeable the longer you work with the camera.
That said, mirrorless cameras are not off the table. These are cameras that operate without the internal mirror system found in traditional DSLRs, making them lighter and more compact. If you are shooting food photography or setting up a self-portrait studio, a mirrorless camera can absolutely work. It is a solid, more affordable entry point.
For events photography, you don’t even need studio lights. A full-frame camera paired with a flash is enough to cover most situations.
As for brands, Danica points to Canon and Sony as great starting points. Both have user-friendly systems that are easy to learn. She personally uses Sony because it works well for both photo and video.
QUICK SUMMARY
- Studio and portraits: full-frame camera
- Food and self-portrait: mirrorless works fine
- Events: full-frame + flash
- Recommended brands: Canon or Sony
Learn more about full frame cameras: https://camerarecaps.com/what-is-a-full-frame-camera/
Learn more about mirrorless cameras: https://amateurphotographerguide.com/what-is-mirrorless-camera-guide/
LENSES: START SIMPLE, UPGRADE WHEN IT MAKES SENSE
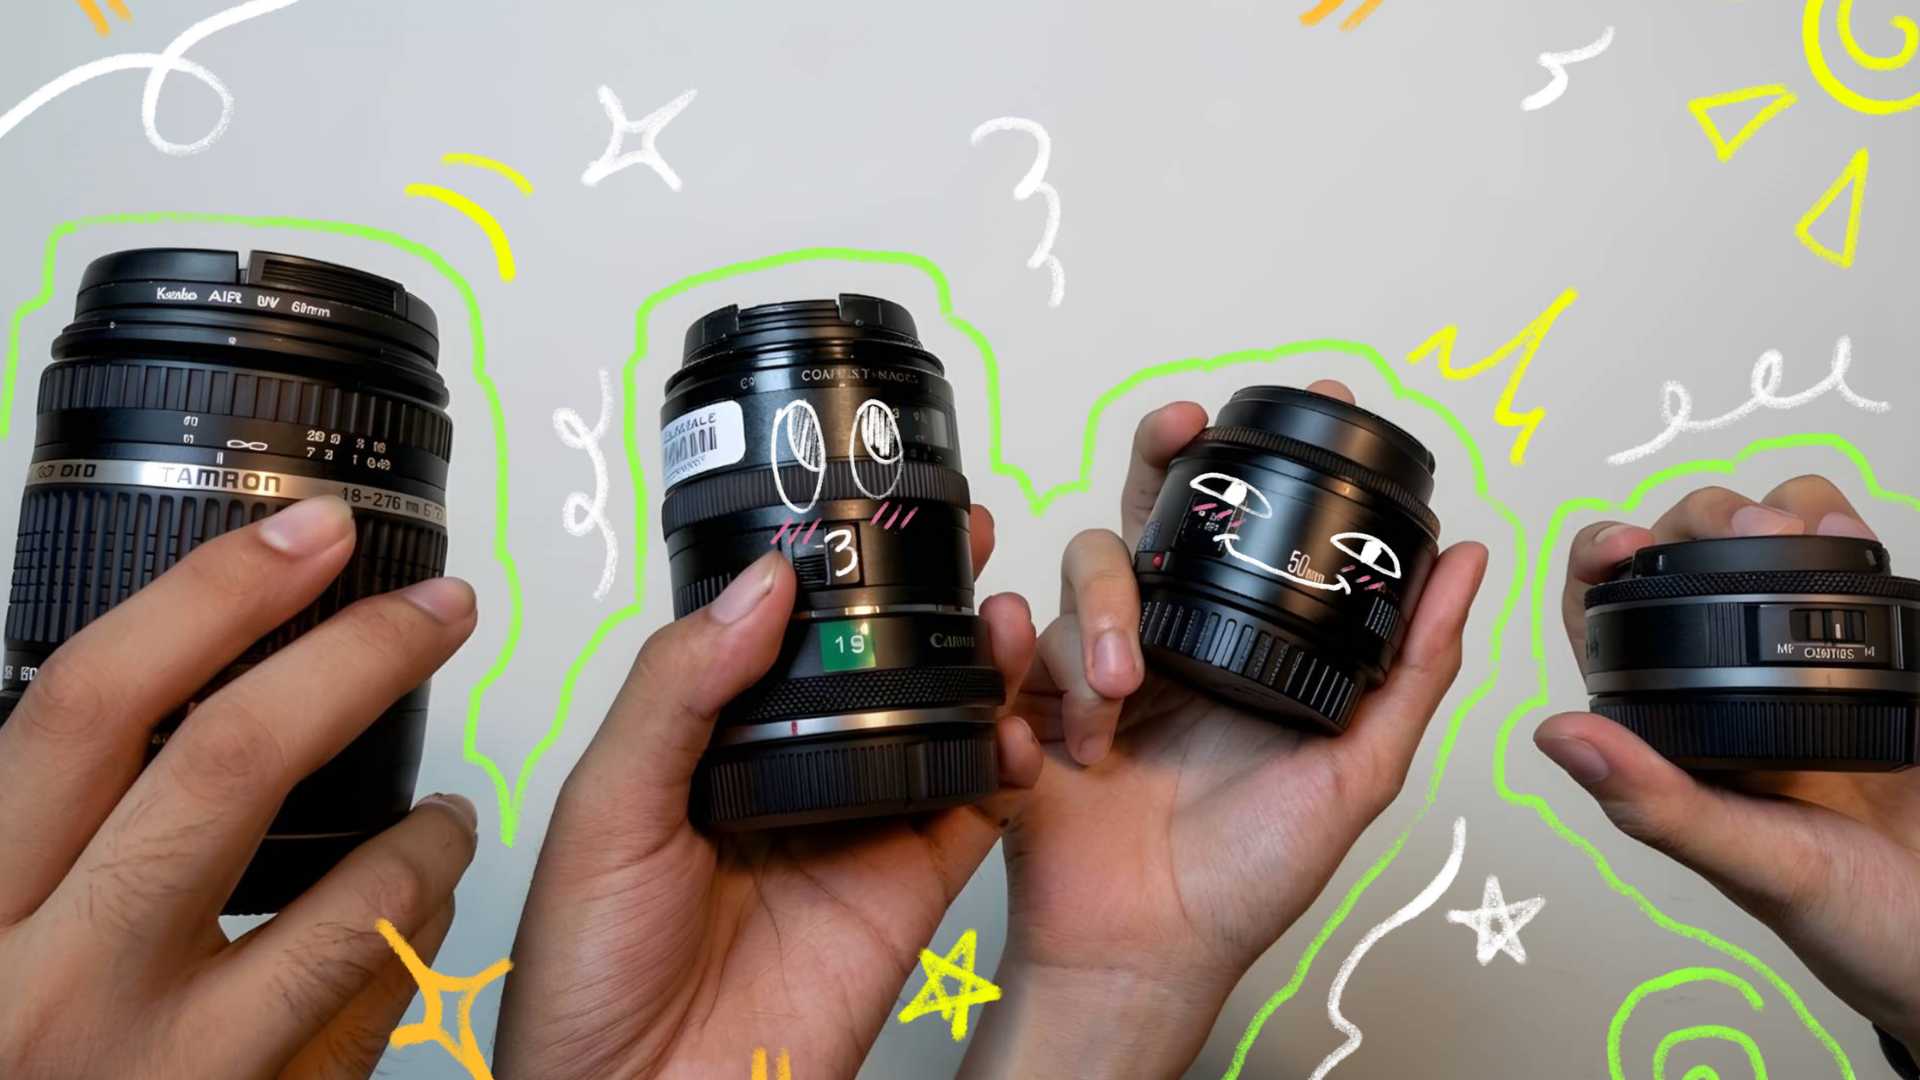
You don’t need a full lens kit on day one. Start with what you have, get comfortable, then level up.
For food photography, a kit lens is a perfectly fine starting point. Once you’re ready to get into more detailed, close-up shots, that’s when you move to a prime lens. Prime lenses give you sharper images and work great for the kind of detailed food shots that really pop.
For commercial photography, Danica recommends investing in a prime lens and also points to the Tamron 28-70mm f/2.8 as a go-to option. It’s a versatile lens that a lot of photographers use for commercial work, and it handles a wide range of shots well. (Note: Make sure to read the product information first to make sure it is comapitable with your camera of choice)
QUICK SUMMARY
- Beginner: kit lens (especially for food photography)
- Upgrade: prime lens for detail-focused and portrait work
- Commercial: prime lens + Tamron 28-70mm f/2.8
POST PROCRESSING: THE PART NO ONE TALKS ABOUT
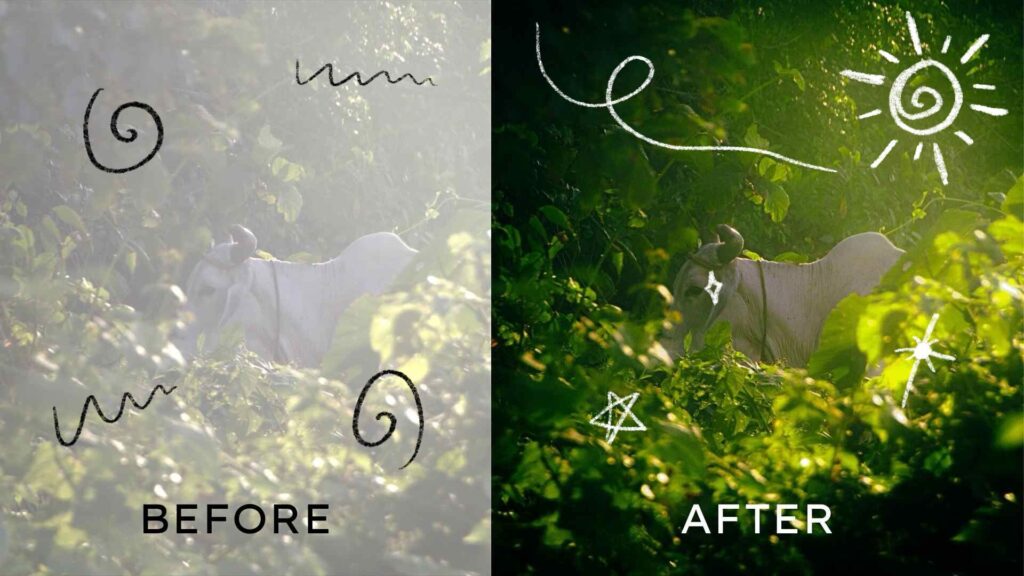
Gear matters, but it’s not everything. Danica makes a really important point here and that is editing.
“if you know how to edit well, you can make budget equipment look professional.”
-Danica Lukban
A great eye and solid editing skills will take you further than expensive gear alone. So while you’re building out your setup, invest just as much time into learning your editing software. It pays off more than you’d think. The best software to ber reccomended is Adobe Lightroom if you are focusing on touching up the lighting of the photo. If you have intentions of added elements into the photo, Adobe Photoshop is still the best tool out there. For those that want a free alternative, AFFINITY is the best alternative to Adobe especially that they work with canva.
When doing post-processing, there is a workflow that can be followed in order to have a smooth editing process. Firstly, always organize your photos into folders and use proper labeling to identify your selects. Second, when editing, always have a clear goal of what you want to achieve. If you want to make the scene moody, focus on color grading. If you want to clean up the subject’s skin, focus on using the heal tool. Thirdly, always try not to lose focus when editing — and if it helps, it is okay to listen to music while doing so. Fourthly, once the edit is done, export the photos to the right folder labeled “Final Edit” or “First Draft,” depending on whether the client has given feedback. Lastly, even though you improved the photo through editing, treat it also as a learning opportunity — reflecting on how you could have taken the photo differently so that less editing would be required next time.
TO SUM IT UP
No camera, light, or lens will do the work for you. What will is consistency, a willingness to keep learning, and the patience to grow into your craft.
And if there is one thing Danica made clear throughout our conversation, it’s that the best setup is the one you actually know how to use. Start with the basics, shoot as much as you can, and build from there.
YOU PHOTOGRAPHY STARTER GUIDE
Phozine is a photography resource for Filipino creatives navigating the freelance industry. For more insights from working photographers, explore our articles, guidebook, and podcast.
LATEST ARTICLES
STARTING FREELANCE PHOTOGRAPHY
This guide explores the essential business and creative knowledge you need before making the leap into the industry.
APRIL 3, 2026
WEDDING PHOTOGRAPHY IN THE PHILIPPINES
Manila-based photographer Rico Andaya shares a his look at the realities of the wedding industry in the Philippines.
APRIL 3, 2026
HOW TO START A BUSINESS IN PHOTOGRAPHY
Photography may start as a passion but as a business means work and this guide will walk you through everything you need.